
Decided to add a spinner to an X-Arcade Tankstick. This is how and why I decided to do it the way I did.
You need.
1 - A spinner unit. (If you're wondering, it's the free spinning knob that breakout or pong games used instead of joysticks or gamepads). Ordered the spinner from GroovyGamerGear.com, and they were great. They checked my order and even refunded me a little because I'd ordered an option that I didn't need. Excellent service from them, I'm definitely going to be using them again.
2 - A place to mount the spinner. I used an X-Arcade Tankstick because it had the space to place it, without getting in the way of the other buttons, player 2, or my fat sausage fingers.
3 - A 1 1/8 spade bit. Looks like a drill bit, but has a very wide piece to make the hole for the spinner.
Process is fairly simple. I did not measure, or do anything to prepare. I just kept eyeballing the innards to see if what I was going to do would fit, and I could get tools, wires, and fat sausage fingers into those areas. There are only two extra wires for the spinner. A USB cable to attach a little circuit board to the PC, and a tiny ribbon cable to run from the circuit board to the spinner itself. GroovyGamerGear.com included all the screws and pieces you needed to attach it.

Spinner control board, it's really small.

Spinner connection, it's really REALLY small.

Screws and standoff plastic to secure the board in your control area.
So hear goes... After looking inside the Tankstick, and seeing how tall the spinner was (I ordered the energy storage cylinder, which is a weight on the bottom that adds an inch or so to the depth), the upper area of the Tankstick seemed the only reasonable place to put it. Most other places had wiring or button hardware in the way. The Tankstick is higher at the top (1 and 2 player button area) than it is at the bottom. You could add it near the bottom, under the player buttons, but with the extra length there would have been more fiddling with drilling out even more holes to accommodate it. I wasn't keen on drilling into my Tankstick to begin with, let alone into the MAME cabinet itself.

The large square in the middle is the trackball housing, and just up to the right of that is where the spinner is hopefully going to go. The black tubes are the mechanisms for the buttons on the rear of the Tankstick, and the left one has to move to make room for the spinner.
1 - Drill extra hole in the back of the Tankstick to move the button.
In my case only one of the buttons on the back had enough slack in the wiring of the switch to be able to move it. No idea if they all come that way, this is how mine was. So that's why I moved them the way I did. One leapfrogging over the other. It just means that on the back of the Tankstick they appear to be switched around. No biggie, as one is for programming and the other is to lock the trackball into one axis. Not every day occurrences. I put duct tape over the spot I was going to drill, and drilled from the finished side down. Don't know if this helped protect the wood or not, but I hear everyone say to do it this way, and it worked for me.

Guess where the hole is going to be....
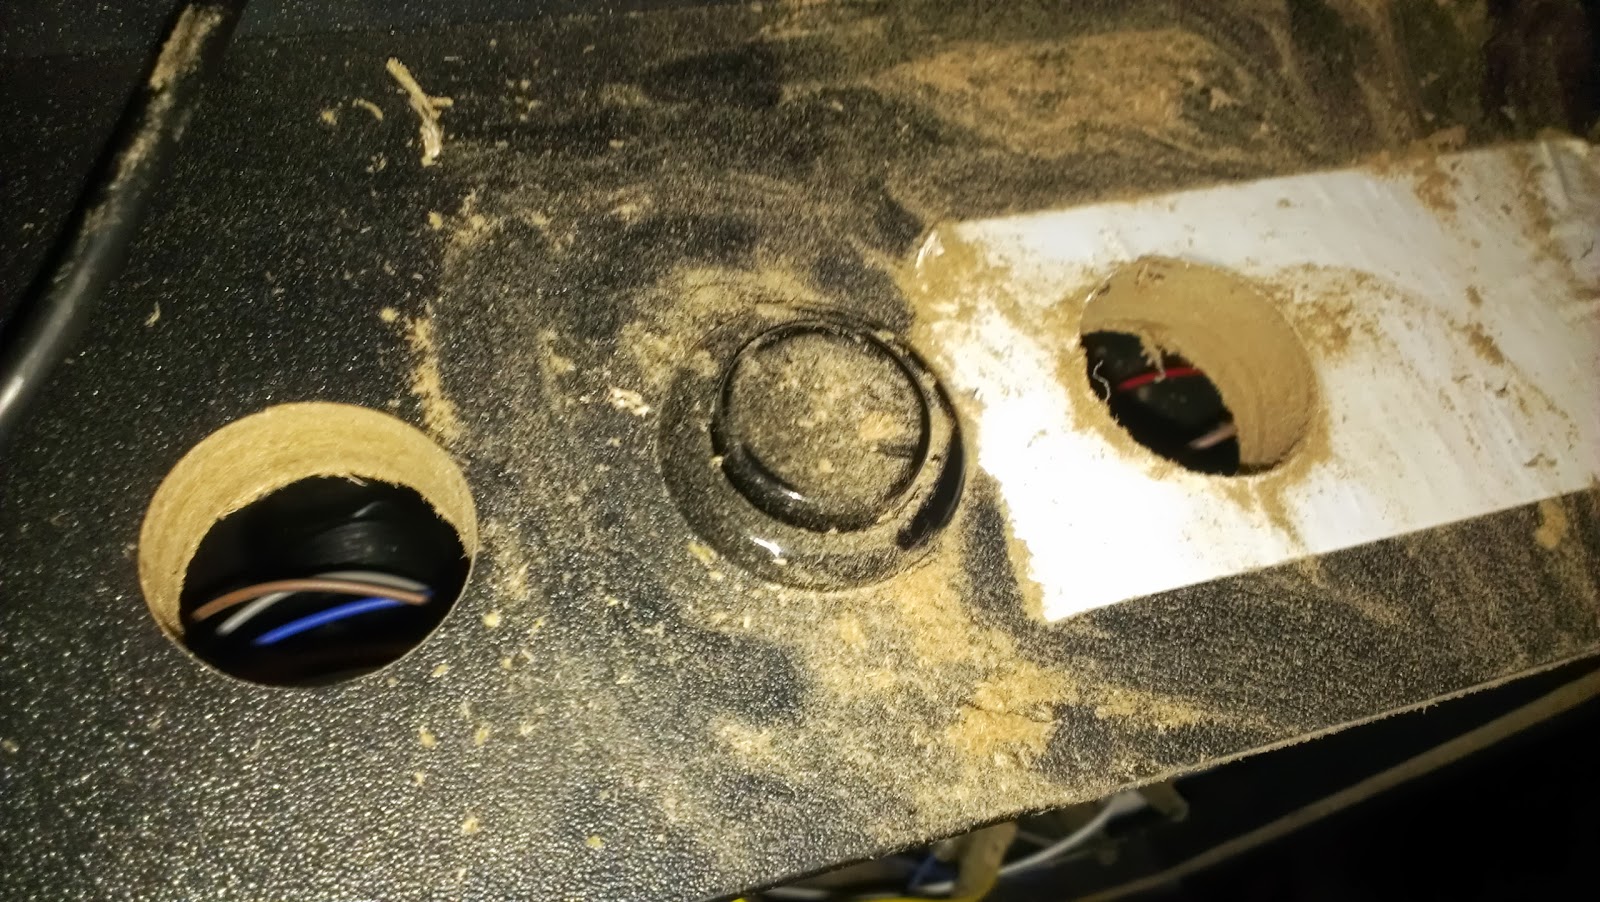
This makes it look like there was a little dust after drilling. This is a lie, there was a LOT more than this, be prepared.
2 - Move button.
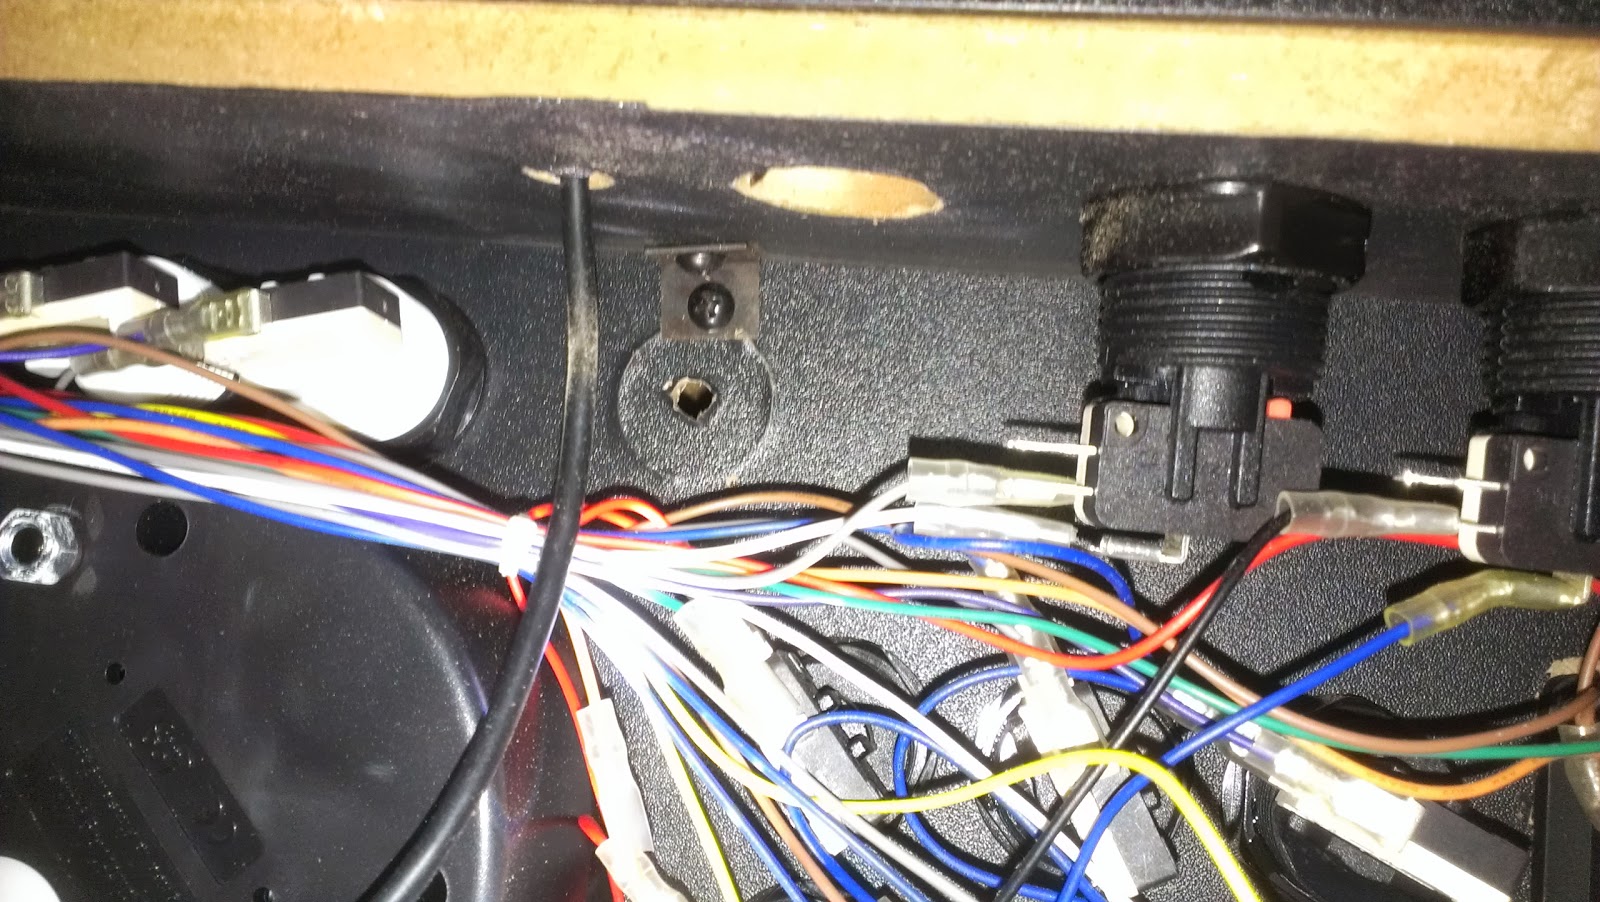
This is so simple. Just unscrew the ring underneath that holds the button in place, take off the switch (it just pops out), and then pull the button up through the hole. Put the button in the other hole, screw the ring back on so it sits tight, and then replace the switch on the bottom of the button. Takes two seconds. I'd never removed a switch part before I did this. I discovered that it just clips in place by matching two holes with two bumps on the switch.

Before the hole, showing which button had enough spare wiring to reach, by removing the switch mechanism and laying it where it would eventually sit.

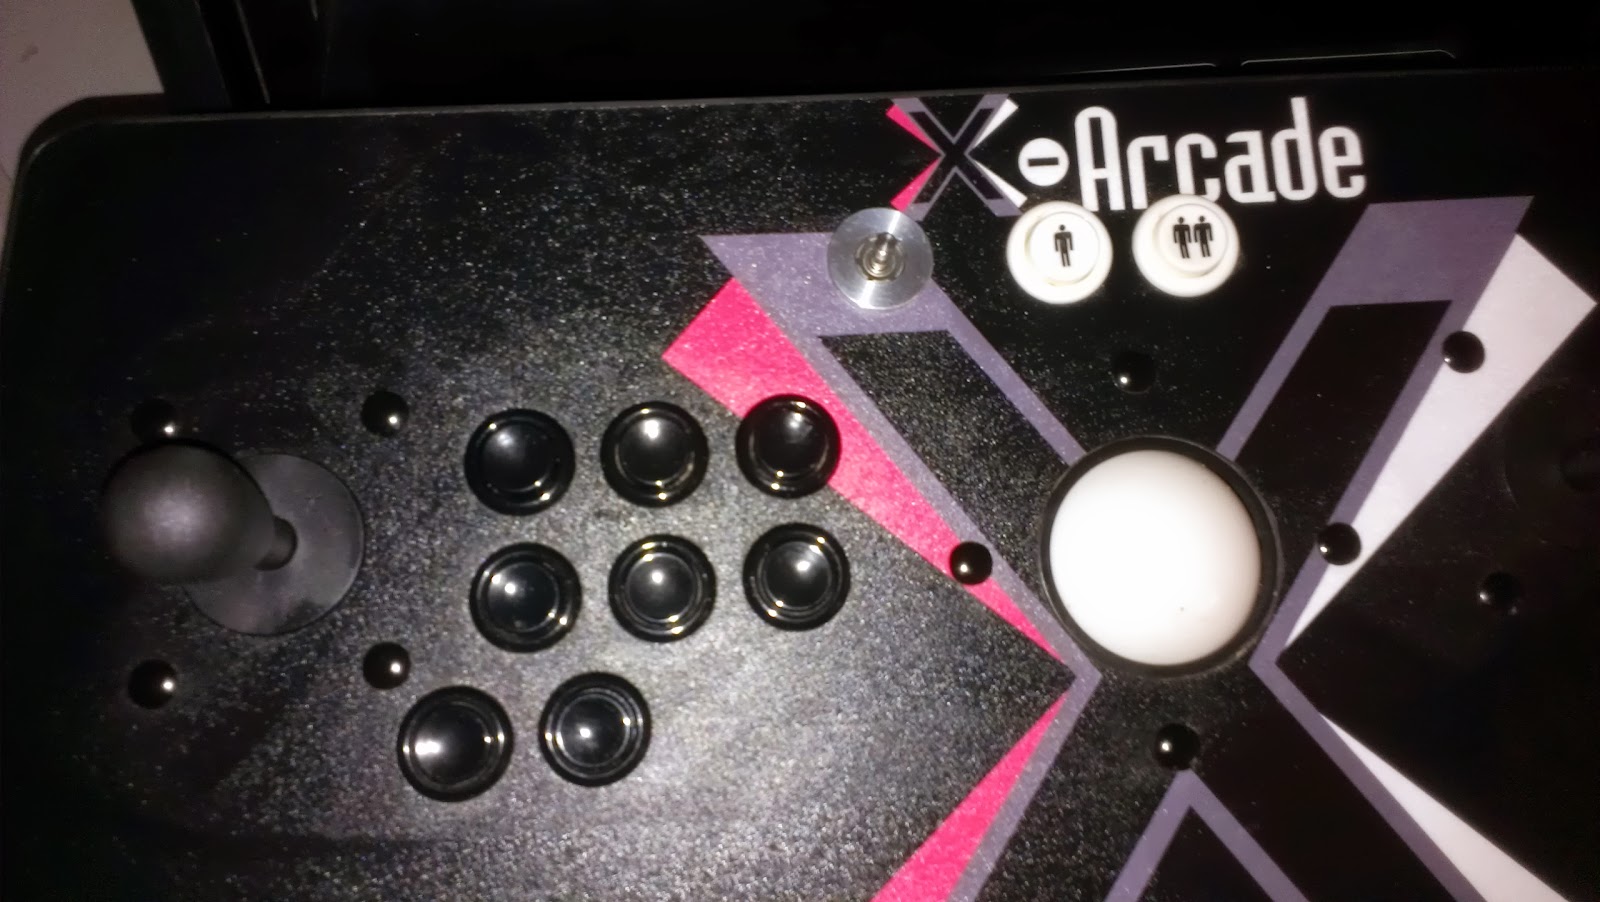
Button moved to the new hole and mechanism replaced in the base. This part is done.
Drill hole with the spade bit, exactly as you did before. Use the included tools to take the top off of the spinner, and drop it through the hole. Attach the top again, and you have a spinner seated in your control layout. Go ahead, I'll let you spin it a few times before the next stage.

Marked out where to drill. The moment the drill touched this, the tape wrapped around the bit like a cotton candy machine, but it didn't seem to affect anything. The edges of the hole turned out fine.

Hole done but had to remove a tiny metal L shaped bracket from inside the Tankstick as it was just a smidge in the way. You can see the original screw holes of the bracket just above the hole.

Spinner inside, but touching an existing cable from the trackball.

Showing the depth of the spinner.
Top view without the top of the spinner attached. GroovyGamerGear.com includes an allen wrench for attaching and re-attaching the knob or the weight.

Spinner top attached and it was higher up than I was expecting, which was good because it kept my sausage fingers well away from the nearby button.
4 - Mount the tiny circuit board.
Find a spot in the case where you can mount the board, and screw it in place using the supplied screws and plastic standoffs that keep the board secure. I had to remount it at an angle because I was lucky that the USB cable attached as it did, but as it looked like it might be pressing against another button, so I decided to move it to take the strain off. It ended up at a slight angle rather than laying straight inside the Tankstick. As I said, I didn't measure, I just did it.

5 - Plug in the wires.
Plug the supplied USB cable into the circuit board, and the small ribbon cable into the spinner. The hole left when I moved the original Tankstick button was used to take the USB cable out of the Tankstick.

That's it, you're done. Just replace the Tankstick base and get spinning.
Other little details that came up while I was installing the spinner.
A bracket inside the Tankstick just happened to be in the way of the hole, so I removed it. Can easily stick it nearby later on.

The spinner was touching the trackball cable that comes into the back of the Tankstick.

You can see it here, how the weight on the bottom of the spinner brushes up against that trackball cable.

A cable fastener that came with the spinner was just right to keep the trackball cable out of the way.

Checking the width of the drill spade by pushing it into the original button hole.

A button without the switch in the three fingers at the base. Here you can see the nut that tightens it against the case when it's put through a hole. So you would unscrew it all the way off, drop the button through the hold from the outside and then screw the ring back on again from underneath.
Overall it was really simple. I'd only kept putting it off because I didn't want to drill into the X-Arcade Tankstick case, but as it worked out things went smoothly. A few games of Arkanoid were played shortly afterwards. The spinner acts just like a mouse and if you spin it while at the desktop, your mouse just moves from side to side.
3 comments:
Thanks Krysss, great article. I followed it when installing my own TurboTwist 2 spinner a couple of days ago, very useful!
I've tested it with every MAME spinner game I have, and it works great in each one except Mad Planets (does nothing). Do you by any chance have MAME configured to use the spinner in Mad Planets? Thanks again.
I just tried it and by default it made the player ship spin around. I still had to move around the screen using the joystick. In the game options it has ENABLE MOUSE INPUT checked. I'm using MAME32 as the front end.
Glad you found the spinner information useful. Do you have pictures of your installation?
Huh, maybe it's a problem with Mame4all, or at least the one built for the Raspberry Pi.
You know, I didn't think to take pictures while I was installing the spinner ... argh. Anyway, I have it installed directly under the right joystick, about an inch below the bottom row of buttons. I don't have the energy storage cylinder (got a premium knob instead); I don't think it would have fit vertically in that space with the ESC.
Thanks.
Post a Comment